

XML Import
Most frequent practice I find myself doing on the Edit page is importing a project from FCP, Adobe Premiere, or AVID.
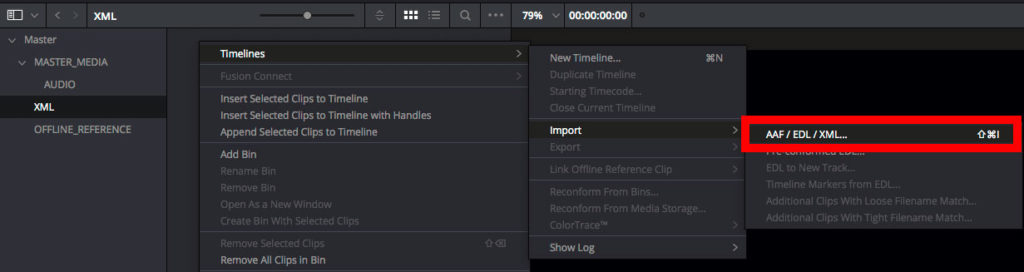
This can be done by right clicking in the Media Pool Palette, and from Timelines > Import select AAF/EDL/XML. There are a various file types you can select, in this case we are using a FCP10 XML file that is .fcpxml.
[one_half]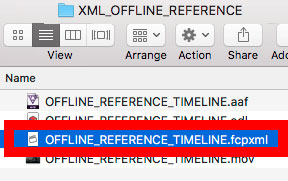 [/one_half] [one_half_last]'OFFLINE_REFERENCE_TIMELINE.fcpxml' can be found in the XML_OFFLINE_REFERENCE folder. I've included .AAF files and EDL files but have a specific tutorials related to the more advanced NLE transfer formats.[/one_half_last]
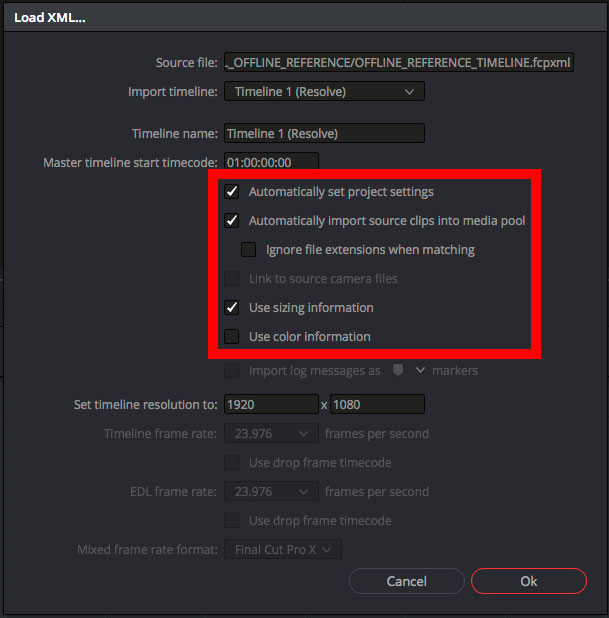
The ‘Load XML’ dialog will appear that gives you several options to control the xml import. ‘Automatically Set Project Settings’ will use the same timebase, resolution, audio settings found in your Final Cut X sequence. ‘Automatically Import Source Clips into media pool’ will bring all the media from the FCPX project into your Resolve Media Pool. In this case we already imported the files from the Media Page tutorial.
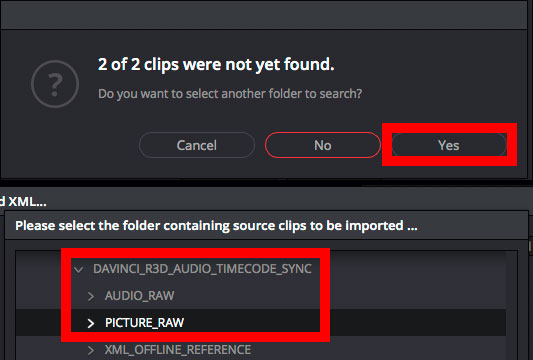
If you started a new project file then keep the 'Automatically Import Source Clips into media pool’ checked which will likely bring up the above dialog to select another folder to search for the clips that were not found. Use the Directory navigator to locate the PICTURE_RAW folder on your System Storage.
‘Use Sizing Information’ will import all the scaling and transforming data from FCPX project. The great thing about this feature is that if you were doing a 25% pushin on the 1080p transcode, then Resolve will do that same pushin on the 5K resolution footage so when you export to a 1080p file, there will be little to no degradation. You can also 'Use Color Information' if coming from FCPX. Typically I uncheck both of these if I know I will be doing a round-trip and the scaling re-applied in FCPX after the media is graded.

Now that our XML has imported, and relinked to original Raw media, we need to verify the edit hasn’t changed by using an Offline Reference Clip. During the Media Page tutorial we looked at importing an Offline Reference Clip. We will match this up to the newly imported FCPXML sequence, by right clicking the timeline and select OFFLINE_REFERENCE_TIMELINE.mov from the ‘Link Offline Reference Clip’ menu.
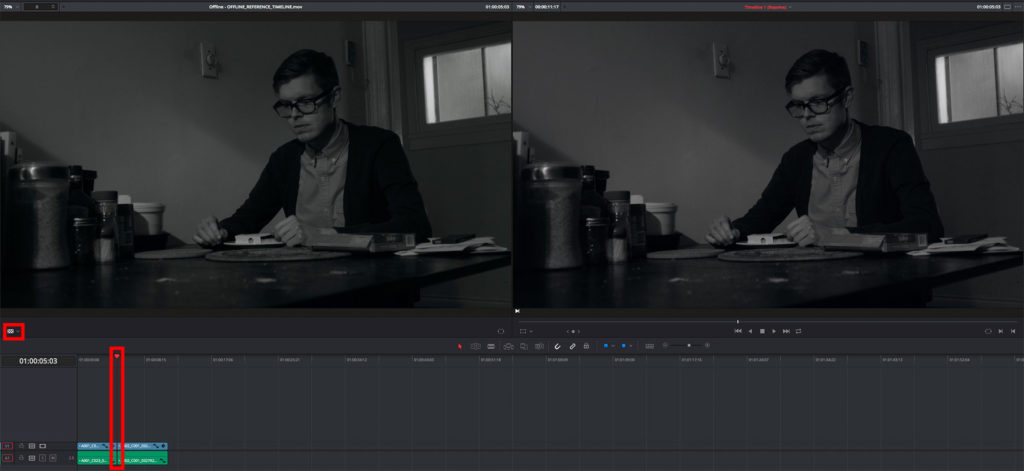
After selecting the ‘Offline Checkerboard’ button on the left under the Source Viewer, the Offline clip should match that of your Timeline viewer. If not ,make sure you reference clip has the same timecode start as the timeline. Now we can scrub through the timeline, and make sure that all of our clips match the Offline reference.
[one_half]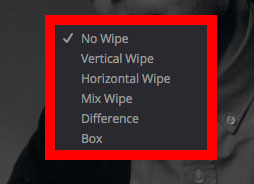 [/one_half] [one_half_last]We can also right click the timeline viewer and open up an overlay to make sure the Offline Reference is 100% frame accurate. Typically I prefer Difference, and scrubbing through and entire program. Any parts that are not black are different then the original Offline Reference. If clips need to be moved or scaled we can use the Inspector in the top right corner to transform the clip.[/one_half_last]
[one_half] We can also use this panel to crop, composite, retime, and correct lens distortion. There are also Mixer panels for viewing the audio VU meters, and Metadata panel to see information about the selected media.
We will look at the Editing tools and cutting in a later more advanced editorial focused video.There may be some clips that are completely wrong. This is because there was a conflict with the filename or timecode which is the hierarchy that Resolve follows when matching media.[/one_half] [one_half_last]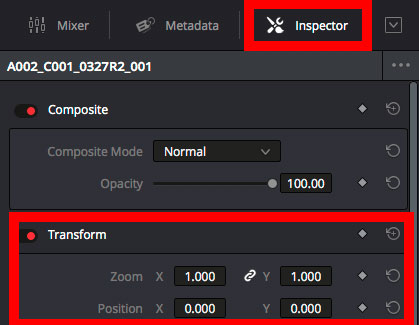 [/one_half_last]
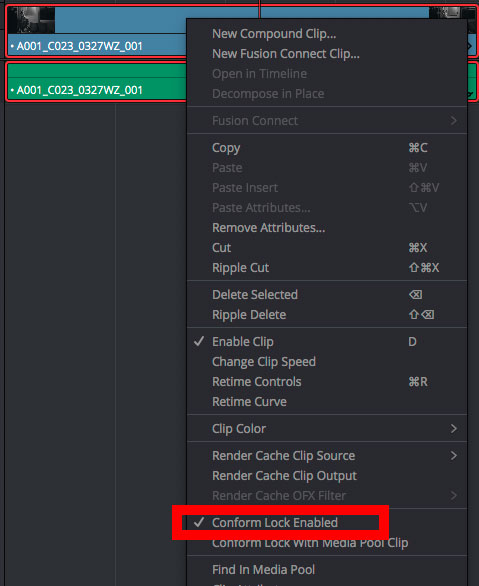
To fix this, we need to right click that particular clip and uncheck ‘Conform Lock Enabled’. So we can manually specify the clip.
![]()
Now there will be an exclamation mark on that clip beside the filename that you need to select.
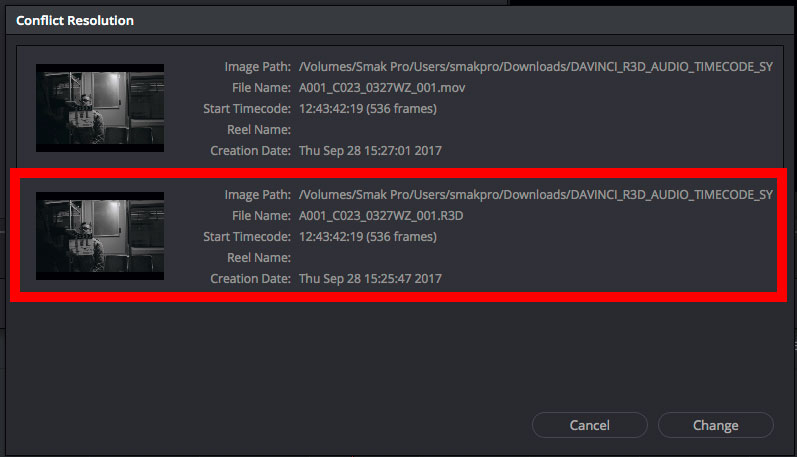
This will open the 'Conflict Resolution' dialog to specify the correct clip according to the Offline Reference. In this case we have a Quicktime .mov and a Red RAW R3D. Resolve see's both having matching meta information and wants you to specify the desired option. If you unable to find the proper clip from the list, you can search for that clip in the Media Pool, and right click the timeline clip that is having an issue, and select ‘Conform Lock with Media Pool’. This is a way of forcing the clip into the timeline.
Extract Audio
[one_half]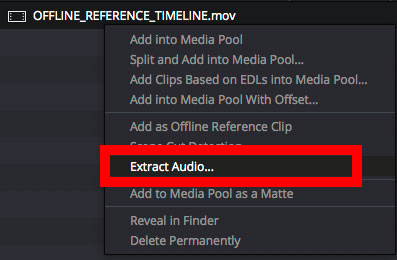 [/one_half] [one_half_last]If you only wanted the audio from a particular file, you can select media from the Media Storage and right click to open the option dialog. In this case we are going to select Extract Audio. This will pull a .wav file from the media so that you can import only audio into the Media pool.[/one_half_last]
Scene Cut Detection
[one_half]If you have tried XML, EDL, AAF all to no avail. The last way of trying to import your project, and probably the most advanced is with the Scene Cut Detection. This feature interprets video media, and finds all of the cut points based on large changes between frames. Select the desired clip in the Library browser of the Media page. Right click this clip, and select ‘Scene Cut Detection’ from the dropdown.[/one_half] [one_half_last]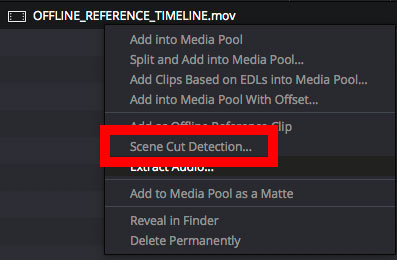 [/one_half_last]
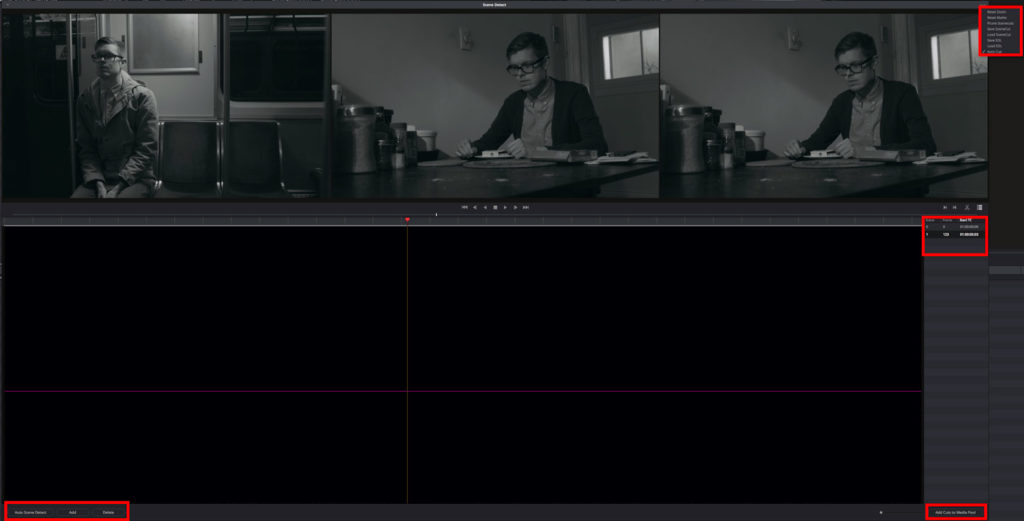
This will open the ‘Scene Cut’ window, where you select ‘Auto Scene Cut’, and Resolve will begin to interpret the clip as shown by the progress percentage. After the progress reaches 100%, you can use the ‘Cut list’ to view the first clip and use the three viewers to determine whether the scene detection was a success, or if you have to do some modifications. If the left viewer is one clip, and the middle and right viewer are the same clip, you have succeeded. If they are all the same… There is something out of whack, and this didn’t find the right cut point. You can drag the magenta confidence bar down or up to adjust the sensitivity of the cut detection, which should make your entire sequence more accurate to the original cutting copy. If you need to manually remove or add a cut, this can be done with the Add or Delete buttons at the bottom of the window. To navigate through the clips you can use the up and down arrows, or previous with the ‘p’ key, and next with the ‘n’ key. After you are satisfied that all the appropriate cuts have been made you can use the options dialog to Save the Scene cut, or save as an ‘EDL’. Or add to your media pool with the ‘Add Cuts to Media Pool’. Now you go to the edit page, and in the timeline window, right click and select ‘Create New Timeline’. Make sure the ‘Empty Timeline’ checkbox is not checked, and after selecting okay, a new timeline will be created that sorts all the cut clips based on their timecode into an edit. If at any point you notice that a proper cut wasn’t made, then just use the edit page. You can use the blade and splice up clips to fix cuts that weren’t detected.